Front view of the 1:12 Aryton Senna Figure with decals quickly applied. The face isn't properly painted so don't jump all over me about it.
Decal Making
January 8th 2000
Here are some samples of the decals I have been making with my ALPS MD-1000. I am still learning so things can get even better.
The red is Model master Acryl paints. The decals had at least two coats of Future Floor applied to the sheet to coat it. I think this was too much, as I will explain later on.
I tried Solvaset, Micro Sol and Super set when applying these decals. In the end I found Solvaset to be the best. Even then it took some work to get the decals to lay down. I think it had to do with too many layers of Future Floor Wax. I am going to try the Micro Film again so it would be easier to get the setting solutions to work.
After the decals were applied I clear coated the figure with Tamiya clear mixed with their flat base to tone it down.
Front view of the 1:12 Aryton Senna Figure with decals quickly applied. The face isn't properly painted so don't jump all over me about it.
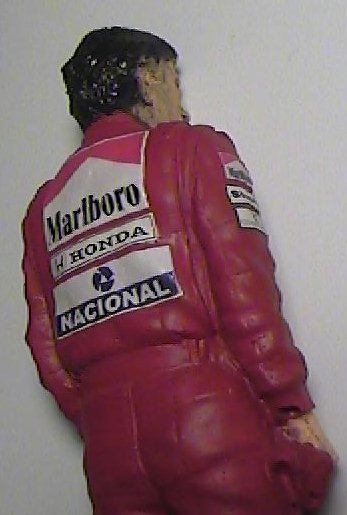
The rear of the figure with the offending Cigarette logos. (Don't get me started on that subject)
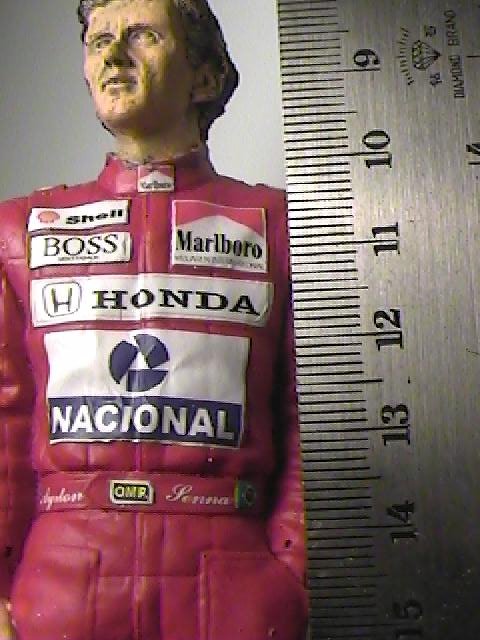
Here is the front of the figure with a meteric ruler beside him to give you an idea of scale. Those are mm not inches.
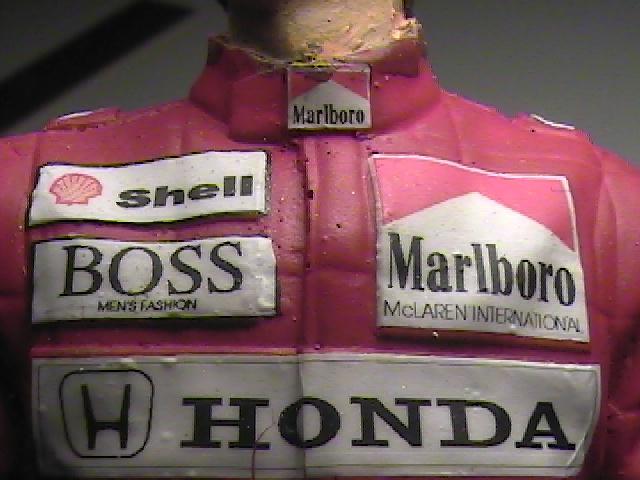
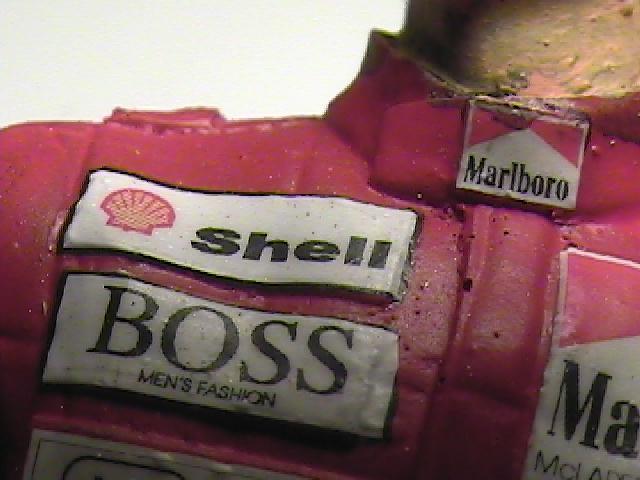
Super close up of the front. You can read the McLaren International and the "Men's Fashion". Go back to the above photo and figure out how small that is. It is hard to see but the Shell logo does not have a solid yellow. It is a yellow with some fine lines in it to get that particular shade of yellow. I will have to work on that. Honda decal is slightly cracked at the "H" Too aggresive with the brush. The line around the Honda Logo does have some slight alaising (sp) but you need a magnifying glass to really spot it. The red in the Marlboro decal is solid. Later on you will see a problem similar to the one in the shell logo. All the white here was printed by the printer. Two layers of white and it is very opaque.
The lower part of the front. Greens, blues and yellows are all solid colour. The Senna is ledgable. Decals are slightly oversized and I will have to fix these in the graphics program. You can see a couple of pinholes on the figures arms. Here they look like crators.

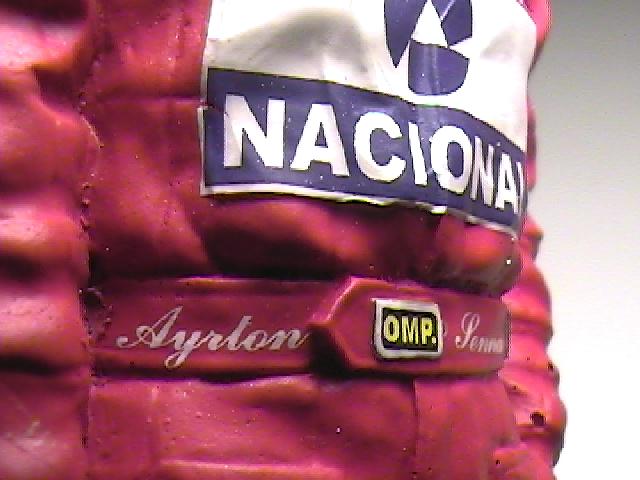
The other side showing the Aryton decal. Here also the Nacional decal cracked by the "N". May be due to the Future Floor Wax coating not being as flexible as Micro Film would be.
Here is a very close up of the Shell logo. Here you can barely see the horizontal lines going through the yellow area.
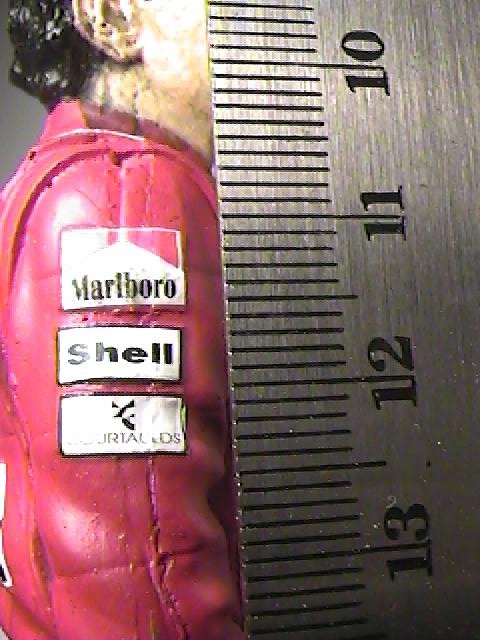
Here is the right side of the figure with a ruler showing the size.
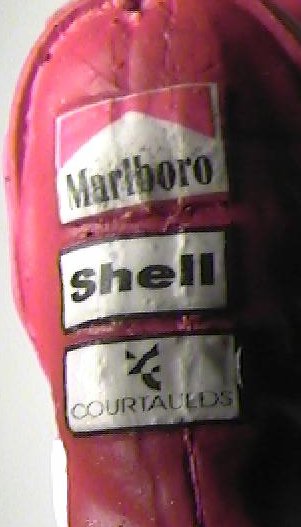
An even closer shot. Notice the sharpness of the Courtaulds words and logo. The Marlboro decal is dirty because I stuck my thumb on it and the dirt transferred from my thumb to the decal.
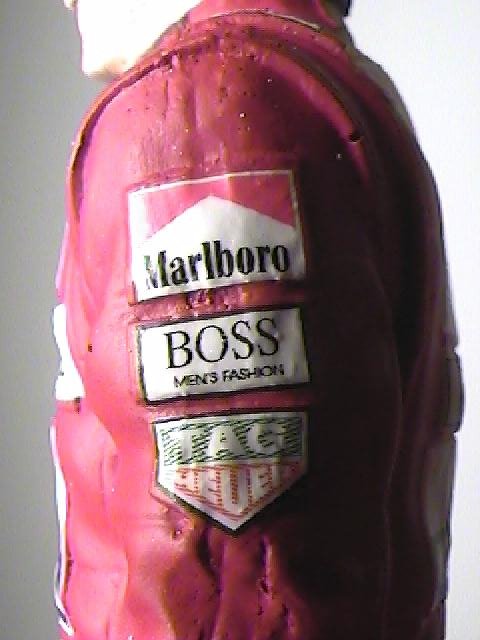
Here is the other arm. Here you can see the green and red in the Tag Heuer decal are not solid as the printer or drawing program tries to approximate the colour it thinks I want. This will have to be fixed.
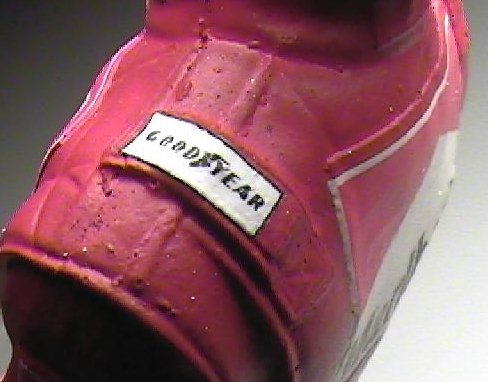
The Goodyear logo on the shoulders. Now that I have the Goodyear and Marlboro logos I can scale them up and down for whatever decal I want.
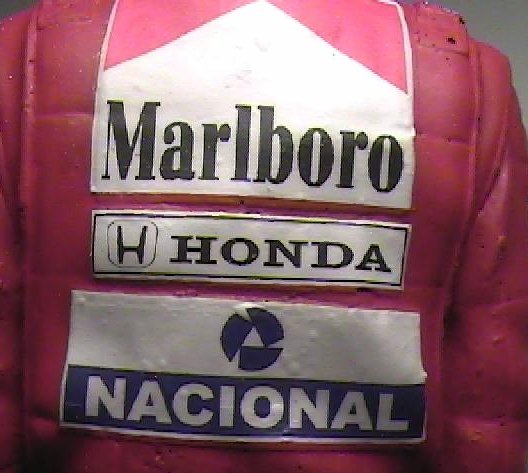
The close up of the back decals. The Marlboro words look slightly fuzzy in the picture but they are smooth in real life. The same for the black line around the Honda decal